Tuesday, July 22, 2025

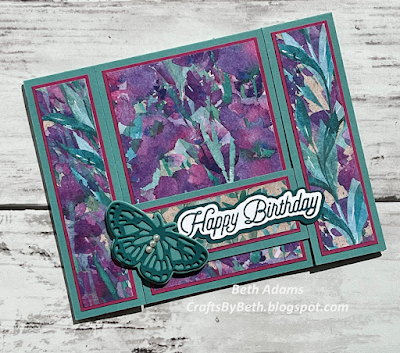
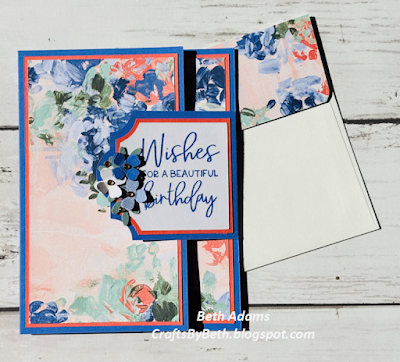
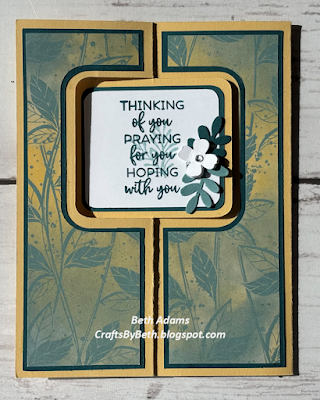
Three Little Inches...

BEFORE YOU DELETE THIS EMAIL, THERE IS MORE THAN ONE POST!

...goes a long way. Check out my Three Little Inches Tutorial, click HERE for more information.

Stampin' Up! Products
  • Brocade Blue cardstock (great substitute for Boho Blue)
  • Basic White
  • Misty Moonlight cardstock
  • Thoughtful Journey Designer Series Paper
  • Butterfly Gala and Delicate Wings stamp sets
    • Misty Moonlight ink
  • Butterfly Duet punch
  • Pearl Basic Jewels
  • Dimensionals
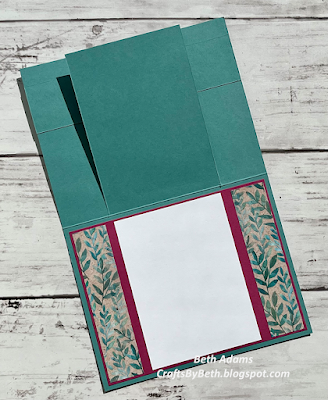
Two cards from 6" x 6" for this DSP.


Take a guess how many cards you can make from a 12" x 12" piece of paper?

Sunday, July 20, 2025

Brother ScanNCut Card Files by Beth - Wrap Around Fun Fold File

With the HIGH prices for Stampin' Up! cardstock, I am pulling out my retired DSP and before using the SU current cardstock colors. I am matching up colors with my retired cardstock. The easiest way to find out what colors coordinate, checkout THIS website. Please consider donating for this awesome FREE tool.

Brother ScanNCut Card] Files
Wrap Around Fun Fold Cards- Made Easy
All-In-One Cardbase, including the tab

Stampin' Up! Products
  • Cardstock
    • Basic White
    • Kiwi Kiss substituted for Old Olive
    • Real Red substituted for Poppy Parade
  • Painted Poppies Designer Series Paper
  • Special Moments stamp set
    • Memento Tuxedo Black ink
  • Bird Builder and Itty Bitty Accents punches
  • Black Rhinestones
No more cutting layers, no more marking your cardstock, no more frustration because your angles aren't perfect - card making made easy. Brother ScanNCut/Canvas Workspace (cwprj and .fcm files) are available for purchase for $4.95. It includes cut files and information pictures of the files mentioned below. Once you download the file, you can throw away the measurements for creating this card. Life made easy! No more expensive dies! None! Invest in a Brother ScanNCut machine, my affliliate link is HERE. I use the SDX85C model. You can find so many resources on YouTube to get you started using the machine, it takes time but it is so worth it. Once you've mastered the basic steps, come back here and check out my tutorial on how to create your own faux dies using your stamp sets. EMAIL me for more information.

More about this Wrap Around Fun Fold files
  • Wrap Around Fun Fold PDF tutorial on putting the layers together - two different tabs
  • Four Files - cwprj files
    • Card Base and Inside Layers - Card 1 & 2
    • Cardstock and DSP Layers - Card 1 & 2
    • How to Arrange Your Cardstock in BSNC Files PDF
  • Not included: Stamped image, flower, flower and punches 
An example of the PDF Information File

Saturday, July 19, 2025

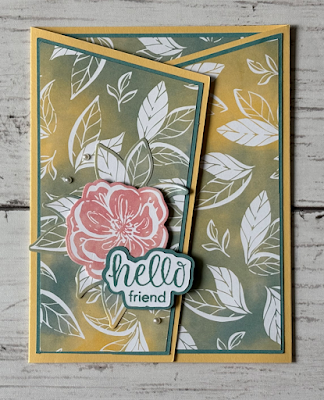
Brother ScanNCut Card Files by Beth - Angled Fun Fold

Brother ScanNCut Card Files
Angled Fun Fold  - Made Easy

Stampin' Up! Products
  • Cardstock
    • Basic White
    • Mossy Meadow
    • Petunia Pop
    • So Saffron
  • Thoughtful Journey Designer Series Paper
  • Special Moments stamp set
  • Memento Tuxedo Black in
  • Itty Bitty Accents punch
  • Spring punch (non SU)
  • Leaf spring punch (non SU)
  • Gold rhinestone
No more cutting layers, no more marking your cardstock, no more frustration because your angles aren't perfect - card making made easy. Brother ScanNCut/Canvas Workspace (cwprj and .fcm files) are available for purchase for $4.95. It includes cut files and information pictures of the files mentioned below. Once you download the file, you can throw away the instructions for creating this card. Life made easy! 

More about this Angeled Fun Fold files
  • Angled Fun Fold PDF tutorial on putting the layers together
  • Three Files - cwprj files
    • Card Base and Inside Layers
    • Cardstock Layers
    • DSP Layers
  • How to Arrange Your Cardstock in BSNC Files PDF
    • Careful arranging and you can cut the cardbase using 8 1/2" x 11"
  • Not included: Sentiment mat layers, flower die cut, punches and envelope layer


Angled Fun Fold Inspirations

In case you missed THIS POST, here are more examples to inspire you. All you have to do is import my file into your Brother ScanNCut, select your paper and press cut. All the measuring is DONE FOR YOU; no angles to cut. Angled Fun Fold in a flash!

Irresistable Blooms


Thoughtful Journey


Wildly Flowering Designer Series Paper - Sidewalk Fun Fold Card


This tutorial includes directions, measurements and instructions can be yours FREE with a $25 Stampin' Up! purchase using my Hostess Code; found on the top right-hand side of my blog - desktop version. The tutorial is also available for purchase for only 
$4.95  $3.95. This tutorial DSP pattern may differ from this pattern; all the measurements are the same.


Click HERE for other examples of this fun fold.

The more and more I use my Brother ScanNCut, the more I LOVE it! No struggling lining up the dies on my Big Shot platform and cranking the die through. I had never seen anyone create perfect layers to stamps, whether it is a sentiment or image.  I made the faux die for the butterfly stamp, what a game changer! The link to my faux die technique is listed underneatje the Delicate Wings stamp information.

Stampin' Up! Products
  • Cardstock colors
    • Basic White
    • Early Espresso
    • Misty Moonlight
  • Wildly Flowering Designer Series Paper
  • Delicate Wings stamp set
    • Paper Pumpkin April 2024
      • Butterfly was created using Crafts by Beth Faux die *
        • Click HERE for more information
      • Misty Moonlight ink
  • Blissful Blooms stamp set
    • Paper Pumpkin - August 2018
    • Early Espresso ink
  • Rhinestones
  • Dimensionals

* I created my own faux sentiment die cut and shadow using my Brother ScanNCut. Every stamp can be a die!

The card layout tutorial is FREE with your $25 Stampin' Up! product purchase from me using my Current Hostess Code. The tutorial is also available for $3.95; click on the Buy Now button below.

Brother ScanNCut Card Files by Beth - Wrap Around Fun Fold File

Brother ScanNCut Card Files
Wrap Around Fun Fold Cards- Made Easy
All-In-One Cardbase, including the tab

Stampin' Up! Products
  • Cardstock
    • Basic White
    • Calypso Coral
    • Orchid Oasis
    • Soft Sea Foam
  • Fancy Flora Designer Series Paper
  • Framed Florets and Special Moments stamp set
  • Orchid Oasis inks
  • Itty Bitty Accents punch
  • Leaf spring punch (non SU)
  • Gold rhinestones
No more cutting layers, no more marking your cardstock, no more frustration because your angles aren't perfect - card making made easy. Brother ScanNCut/Canvas Workspace (cwprj and .fcm files) are available for purchase for $4.95. It includes cut files and information pictures of the files mentioned below. Once you download the file, you can throw away the instructions for creating this card. Life made easy! 

More about this Wrap Around Fun Fold files
  • Wrap Around Fun Fold PDF tutorial on putting the layers together - two different tabs
  • Four Files - cwprj files
    • Card Base and Inside Layers - Card 1 & 2
    • Cardstock and DSP Layers - Card 1 & 2
    • How to Arrange Your Cardstock in BSNC Files PDF
  • Not included: Stamped image, flower, flower and sprig punches and envelope layer


An example of the PDF Information File


Card Style 1 Example

Friday, July 4, 2025

Floral Delight Designer Series Paper - Three Little Inches

Floral Delight Designer Series Paper - Card 2

Stampin' Up! Products
  • Daffodil Delight cardstock
  • Basic White cardstock
  • Pumpkin Pie cardstock (perfect substitution for Peach Pie)
  • Floral Delight Designer Series Paper
    • Complete instructions are available for purchase, see below
  • Beyond the Horizon stamp set
    • Paper Pumpkin March 2022
  • Old Olive ink
  • Brilliant Wings dies
  • Pearl Basic Jewels

Three Little Inches Tutorial
Included in my Mixed Media Floral Designer Series Paper

Thursday, July 3, 2025

Floral Delight Designer Series Paper - Seven Panel Perfect Sections Tutorial

Floral Delight Designer Series Paper - Card 1

I am starting a new series using Stampin' Up! Floral Delight Designer Series Paper. Check back often fo more inspiration.

Stampin' Up! Products

  • Daffodil Delight cardstock
    • Card base measures 8 1/8" x 5 7/16"
      • Scored at 4 1/16"
  • Basic White cardstock
    • Card layer (inside) measures 3 13/16" x 5 3/16"
  • Old Olive cardstock
    • Card layer measures 3 13/16" x 5 3/16"
    • Card layer (inside) measures 1/2" x 5 3/16"
  • Floral Delight Designer Series Paper
    • Complete instructions are available for purchase, see below
    • Card layer (inside) measures 3/8" x 5 3/16"
  • Butterfly Gala stamp set
    • Old Olive ink
  • Inspired Thoughts stap set
    • Memento Tuxedo Black ink
  • Butterfly Duet punch
  • Pearl Basic Jewels
  • Dimensionals
Seven Panel Perfect Sections card Tutorial

FREE Tutorial - HAPPY FOURTH OF JULY!


I created a tutorial using a 3" x 3" piece of Stampin' Up! Mixed Media Florals Designer Series Paper. I am sharing the instructions with you.

Stampin' Up! Products
  • Dusty Durango cardstock
    • Card base measures 5 1/2" x 8 1/2”
      • Scored at 4 1/4"
  • Basic White cardstock
    • Card layer (inside) measures 5 1/4" x 4”
    • Scrap for sentiment
  • Mossy Meadow cardstock
    • Card layer measures 3 1/8” x 3 1/8”
    • Strips measure 5 1/4” x 1/4" (cut three)
  • Mixed Media Florals Designer Series Paper
    • Card layer measures 3” x 3”
  • Hey You stamp set
    • Mossy Meadow ink
  • Tailored Tag punch
  • Dimensionals

The easy tutorial is free; please FOLLOW each step.  These steps must be followed completely. Any email request without following these steps will be discarded.

  1. Post a comment on my blog. Comment link is at the end of this post or Share on Pinterest. Pinterest icon is at the bottom of this post. 
  2. EMAIL me asking for the Diagonal Strips Tutorial. If you post a "anonymous" comment on my blog you have to also state in the email that you commented. When you post anonymously I CANNOT tie it back to an email address.

Sunday, June 29, 2025

How to Use the Mixed Media Florals Designer Series Paper!!


I created a tutorial using this pattern sheet from Stampin' Up!'s Mixed Media Florals Designer Serieis Paper. I created 15 FIFTEEN cards/variations using 3" x 3" squares from this paper. Included in this tutorial is a unique card layout with step-by-step pictures.


This is more than just a tutorial using this DSP - you can take any piece of 12" x 12" paper and cut it up into 3" x 3" pieces , That is SIXTEEN pieces to use with my layouts, no guessing, no measuring, just relax and create!

I created this tutorial using basic cardmaking supplies. I did not use complicated dies. All you need are sentiment stamps as well as a flower, butterfly, dragonfly stamps and embellishments you commonly use. 

Two Sneak Peek

To purchase, click on the BUY NOW button below. The PDF will be emailed to you within twenty-four hours. It isn't automatic.

ONLY $3.95 through July 4, 2025

Monday, June 23, 2025

Mixed Media Florals Designer Series Paper - Quick and Easy


Stampin' Up! Products
  • Petal Pink cardstock
    • Card base measures 5 1/2" x 8 1/2"
      • Scored at 4 1/4"
    • Scrap for sentiment mat
  • Basic Black cardstock
    • Card layer measures 4 3/8" x 3 1/8"
    • Card layer (inside) measures 5/8" x 4"
    • Scrap for sentiment mat
  • Basic White cardstock
    • Card layer (inside) measures 5 1/4" x 4"
  • Calypso Coral cardstock
    • Flower
  • Garden Green cardstock
    • Sprig
  • Mixed Media Florals Designer Series Paper - this pattern is directional
    • Card layer measures 4 1/4" x 3"
    • Card layer (inside) measures 1/2" x 4"
  • Express Yourself stamp set
    • Memento Tuxedo Black ink
  • Layering Oval dies
  • Itty Bitty Accents punch
  • Sprig punch (non SU)
  • Pearl Basic Jewel
    • Dyed with alcohol marker

Margins are 9/16"

Mixed Media Florals Designer Series Paper - Seven Panel Pattern Show Off

Stampin' Up! Products
  • Basic White cardstock
  • Boho Blue cardstock
  • Poppy Parade cardstock
  • Mixed Media Florals Designer Series Paper
  • Butterfly Gala stamp set
    • Misty Moonlight ink
  • Forever Lovely stamp set * 
  • Memento Tuxedo Black ink
  • Boho Blossoms and Butterfly Duet punches
  • Pearl Basic Jewels
  • Dimensionals
* I created a sentiment and sentiment mat layer using my Brother ScanNCut. A tutorial is available on how to make your own faux dies for your stamp sets. For more information click HERE.

For more examples of my Seven Panel Pattern Show Off, click HERE.

Friday, June 6, 2025

Wait! Don't Use the Mixed Media Florals Designer Series Paper!!

... until I am finished with my newest tutorial. The tutorial will not be released until the middle of June.

I am currently working on my next tutorial using Stampin' Up! Mixed Media Florals Designer Series Paper. I am taking this 12" x 12" sheet and using EVERY INCH of this piece of DSP. I am hoping to create SIXTEEN cards that are uniquely different. 

You will not find the Mixed Media Florals Designer Series Paper in your catalog; it is an Online Exclusive. Click THIS link to check out this gorgeous DSP.

I will have more than TEN card designs from ONE 12" x 12" pattern paper. Follow my designs and you'll create at least TWENTY cards using the two pieces of the beautiful Mixed Media Designer Series Paper. This tutorial will be available to purchase or will be FREE when you place a $75 Stampin' Up! order with me. You won't just get this tutorial, I plan on creating cards using the other patterns. 


To place an order with me, click on THIS link and click on "Find a Demonstrator"


Sunday, April 20, 2025

Brother ScanNCut Card Files by Beth - FREE - FREE - FREE

Did you miss my FREE Brother ScanNCut Card File?

I AM BACK with a tutorial line of card layouts.

Do you have the Brother ScanNCut that you purchased to cut shapes and designs to create cards? I purchased my first BSNC maching in 2017 to save money on metal dies for cardmaking. I used it for cutting around stamped images instead of fussy cutting shapes. I then learned how to create layers for punches and my stamp images. Click HERE for information on creating your own faux dies.

I have not been able to spend the time I use to creating cards due to chronic back pain brought on by Failed Back Surgery Syndrome. Do you realize how much twisting you do in your craft studio? It begins by selecting cardstock and pattern paper from your massive inventory, selecting your stamp sets, pulling out ink pads, cardmaking dies, cranking out die cuts with your Big Shot, grabbing your sentiment punches, stamp, glue and finally finishing up with embellishments. Since I couldn't do all of this, I decided to make better use of my BSNC machine. I watched hundreds of  YouTube visits and connected the dots to create files for various card layouts and fun folds. I basically have an unpaid full-time job as a CanvasWorkspace Content Creator.

We all know about the high cost of dies, particularly from my favorite card supply company. One die for $37? I will be offering cut files to save you time and money, I cut the cardstock for you, no more measuring and cutting! 

Three Panel Sentiment Card Layout is FREE

The CanvasWorkspace cut files and easy tutorial are free; please FOLLOW each step.  These steps must be followed completely. Any email request without following these steps will be discarded.
  1. Post a comment on my blog. Comment link is at the end of this post or Share on Pinterest. Pinterest icon is at the bottom of this post. 
  2. EMAIL me asking for the BSNC Three Panel Sentiment Layout. If you post a "anonymous" comment on my blog you have to also state in the email that you commented. When you post anonymously I CANNOT tie it back to an email address.

Brother ScanNCut Card Files by Beth 
Three Panel Sentiment Card Layout
Stampin' Up! Products
  • Wild Wheat cardstock
    • Card base
  • Basic White cardstock
  • Cooper Clay cardstock
    • From back of one of the cards
  • Exploring in Color Card
  • Flourishing Phrases stamp set
  • Cooper Clay ink
  • Dragonflies and Birds embellishments
These are examples of what my BSNC card files tutorial will include. Screen shots for the actual Canvas Workspace file


Everything is Rosy Inspiration

In case you missed THIS POST; check below for inspiration. All you have to do is import my file into your Brother ScanNCut, select your paper and press cut. All the measuring is DONE FOR YOU! Backward Gatefold Card!


Sunday, March 2, 2025

Brother ScanNCut Card Files by Beth - Backward Gatefold Fun Fold Card


Brother ScanNCut Card Files
Backward Gatefold Fun Fold  - Made Easy
Beautiful Inside and Out

Stampin' Up! Products
  • Cardstock
    • Basic White
    • Lost Lagoon
    • Pretty Peacock
    • So Saffron
  • Fancy Flora Designer Series Paper
  • Comforting Thoughts and Dahlia Days stamp set
  • Lost Lagoon and Pretty Peacock inks
  • Itty Bitty Accents punch
  • Leaf spring punch (non SU)
  • Rhinestones
No more cutting layers, no more marking your cardstock, no more frustration because your angles aren't perfect - card making made easy. Brother ScanNCut/Canvas Workspace (cwprj and .fcm files) are available for purchase for $4.95. It includes cut files and information pictures of the files mentioned below. Once you download the file, you can throw away the instructions for creating this card. Life made easy! 


More about this Backward Gatefold Fun Fold files
  • Backward Gatefold Fun Fold PDF tutorial on putting the layers together
  • Four Files - cwprj files
    • Card Base and Inside Layers
    • Cardstock and DSP Layers
  • How to Arrange Your Cardstock in BSNC Files PDF
    • Careful arranging and you can cut the cardbase using 8 1/2" x 11"
  • Not included: Punched flowers

Monday, February 17, 2025

Brother ScanNCut Card Files by Beth - Card Making Made Simple - FREE FILE

I AM BACK with a tutorial line of card layouts.

Do you have the Brother ScanNCut that you purchased to cut shapes and designs to create cards? I purchased my first BSNC maching in 2017 to save money on metal dies for cardmaking. I used it for cutting around stamped images instead of fussy cutting shapes. I then learned how to create layers for punches and my stamp images. Click HERE for information on creating your own faux dies.

I have not been able to spend the time I use to creating cards due to chronic back pain brought on by Failed Back Surgery Syndrome. Do you realize how much twisting you do in your craft studio? It begins by selecting cardstock and pattern paper from your massive inventory, selecting your stamp sets, pulling out ink pads, cardmaking dies, cranking out die cuts with your Big Shot, grabbing your sentiment punches, stamp, glue and finally finishing up with embellishments. Since I couldn't do all of this, I decided to make better use of my BSNC machine. I watched hundreds of  YouTube visits and connected the dots to create files for various card layouts and fun folds. I basically have an unpaid full-time job as a CanvasWorkspace Content Creator.

We all know about the high cost of dies, particularly from my favorite card supply company. One die for $37? I will be offering cut files to save you time and money, I cut the cardstock for you, no more measuring and cutting! 

Three Panel Sentiment Card Layout is FREE

The CanvasWorkspace cut files and easy tutorial are free; please FOLLOW each step.  These steps must be followed completely. Any email request without following these steps will be discarded.
  1. Post a comment on my blog. Comment link is at the end of this post or Share on Pinterest. Pinterest icon is at the bottom of this post. 
  2. EMAIL me asking for the BSNC Three Panel Sentiment Layout. If you post a "anonymous" comment on my blog you have to also state in the email that you commented. When you post anonymously I CANNOT tie it back to an email address.

Brother ScanNCut Card Files by Beth 
Three Panel Sentiment Card Layout
Stampin' Up! Products
  • Wild Wheat cardstock
    • Card base
  • Basic White cardstock
  • Cooper Clay cardstock
    • From back of one of the cards
  • Exploring in Color Card
  • Flourishing Phrases stamp set
  • Cooper Clay ink
  • Dragonflies and Birds embellishments
These are examples of what my BSNC card files tutorial will include. Screen shots for the actual Canvas Workspace file


Friday, October 11, 2024

Craftroom Storage Solution - DIY 6” x 6” Magazine Holder Die for under $5.00

Where can you purchase a die for under $5.00?

Isn't that the reason you purchased a Brother ScanNCut? To save money on dies!

If you have a Brother ScanNCut (BSNC) and aren’t afraid to use it, it opens a whole new world of card making. You’ve seen my posts about my Crafts By Beth Faux Die Tutorial. With the high price of EVERYTHING, a purchase of a Brother ScanNCut machine is a wise investment. 

I purchased my BSNC machine CM250 in 2019 and it sat on my table for a year. I taught myself how to use it following many YouTube videos, and yet it sat mostly unused for another few years. I now have time and I’m putting it to good use and creating faux dies without the cost of individual sets of dies, which cost over $35 each. I LOVE Stampin’ Up! products: stamps, ink, cardstock and their new Designer Series Paper. My affliate for BSNC

Maybe it’s time for you to make the investment. Watch a few videos on the basics and purchase my tutorial for less than the cost of one die set. You will have all the steps you need to create your own dies. 

My first Brother ScanNCut file (fcm format) is now available…Designer Series 6” x 6” Magazine Holder.  No measuring, cutting…all you have to do is upload the file into your BSNC machine, place an 12” x 12” (or use two 8 1/2” x 11”) piece of cardstock on your mat and press cut . Scoring is easy, just apply glue and you’re set. For long lasting durability use a thicker piece of cardstock than DSP. 

How to purchase only the Designer Series 6” x 6” Magazine Holder.  The file is available for $4.99, click the Buy Now button below. I AM NOT ABLE TO PROVIDE AN SVG FILE. You may be able to find a free converter online, try finding before you buy.